Overview
Pagelayer Pro now allows you to add Custom Fonts to your site so that you can add your own fonts to your site. In this feature you can add any number of fonts you want without any limit.
Visual
The following video show you how to add a custom font to your site:-
Description
The following steps helps you to add custom fonts to your site:-
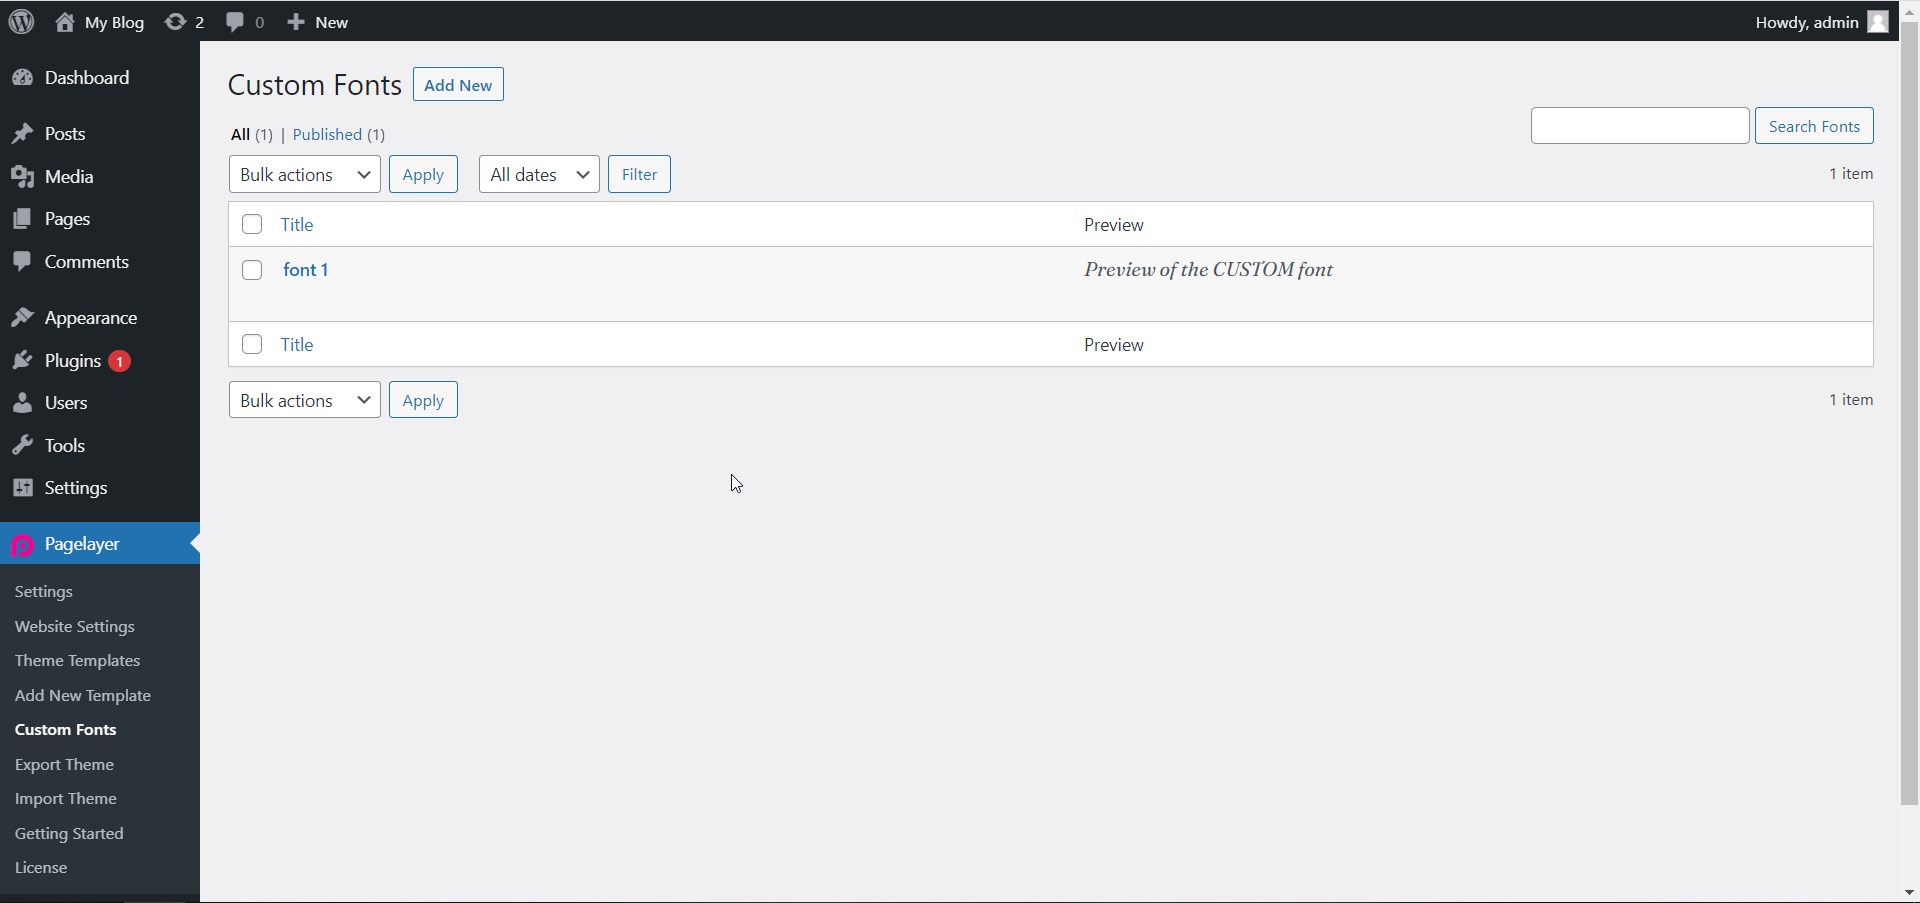
- Visit Custom Fonts page through WordPress Dashboard -> Pagelayer -> Custom Fonts.

- In this page you can manage your custom fonts in which you can add, remove, edit or clone fonts. When you visit this page first time then you will find an empty table. So click on Add New Button on next to Custom Font text to add a new font.
- After click on add new button you will redirected to a new page where you have to insert the font name and upload the font file. When you finished uploading the font file then click on publish so that your font is added to the site.
- After publishing the font you will see a new entry of font in Custom Fonts page, in which you will see font name as well as an example text with font family set as the uploaded font file.

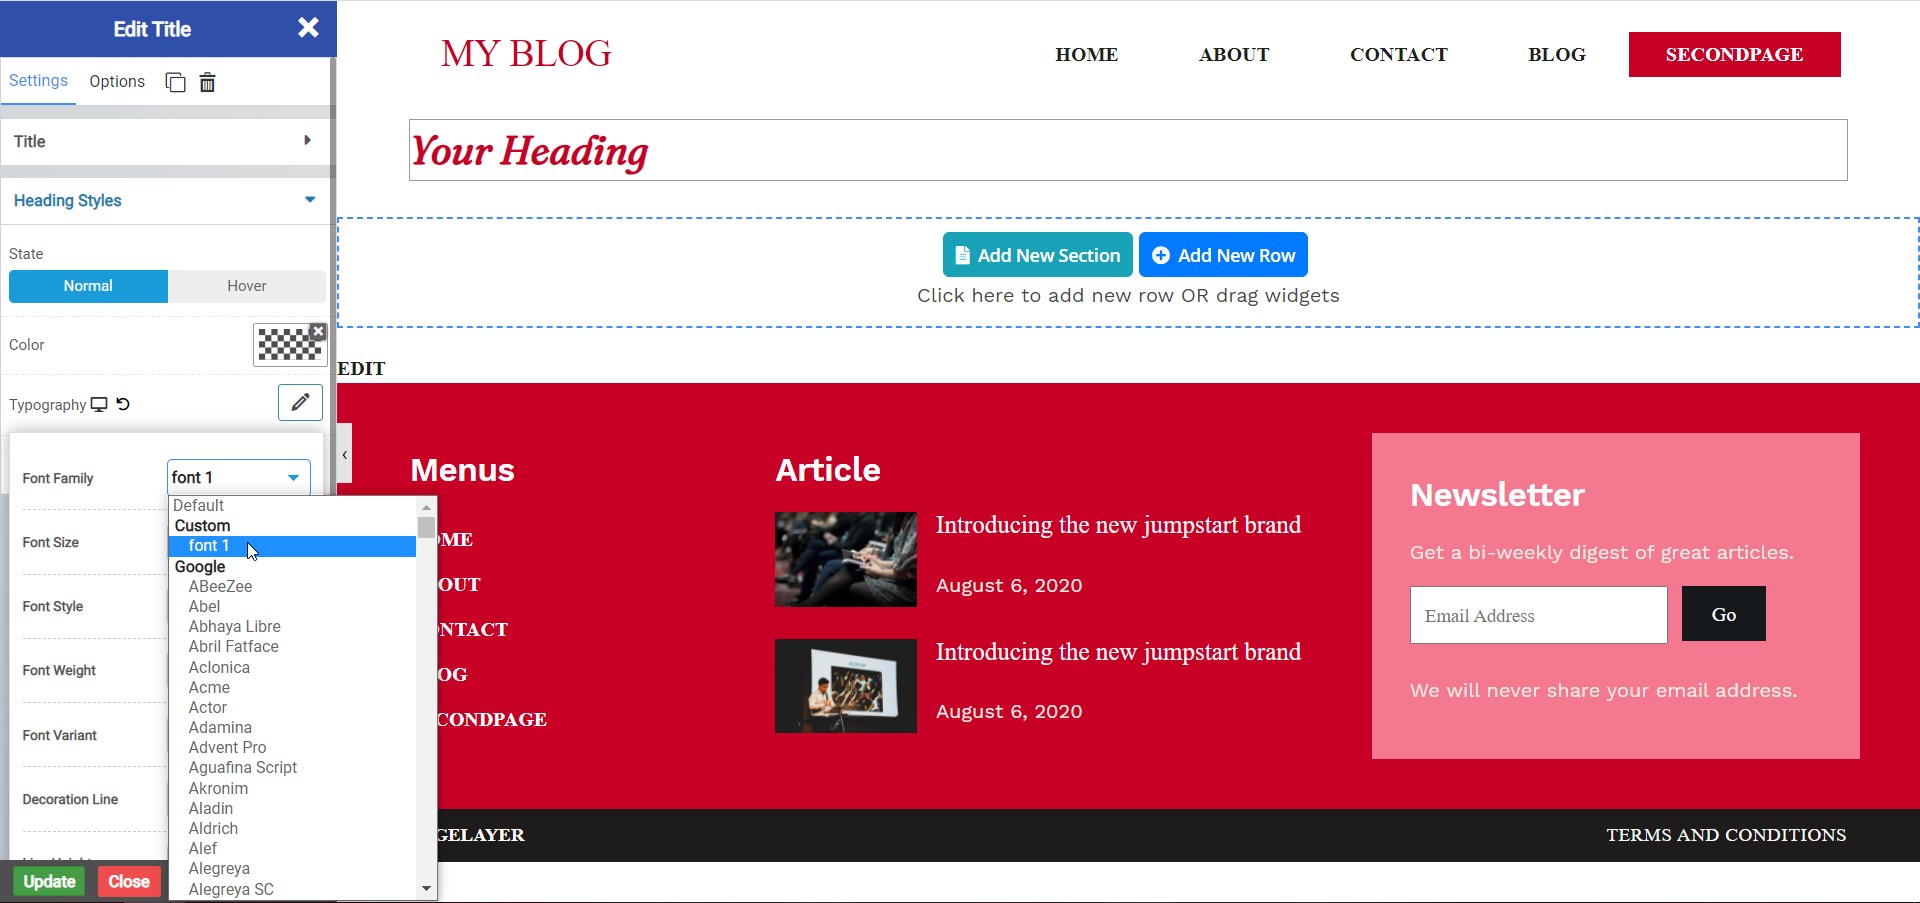
- Now you will find that font in Typography settings of any widget or at all the places in the pagelayer where you can select a font.
Note :- Every custom font requires a font name as well as a font file which should be in the format of ttf, woff and woff2


